0. 引言
利用 Python 开发,借助 Dlib 库进行人脸检测 / face detection 和剪切;
1. crop_faces_show.py :
将检测到的人脸剪切下来,依次排序平铺显示在新的图像上;
实现的效果如 图1 所示,将 图1 原图中的 6 张人脸检测出来,然后剪切下来,在图像窗口中依次输出显示人脸;
2. crop_faces_save.py :
将检测到的人脸存储为单个人脸图像;
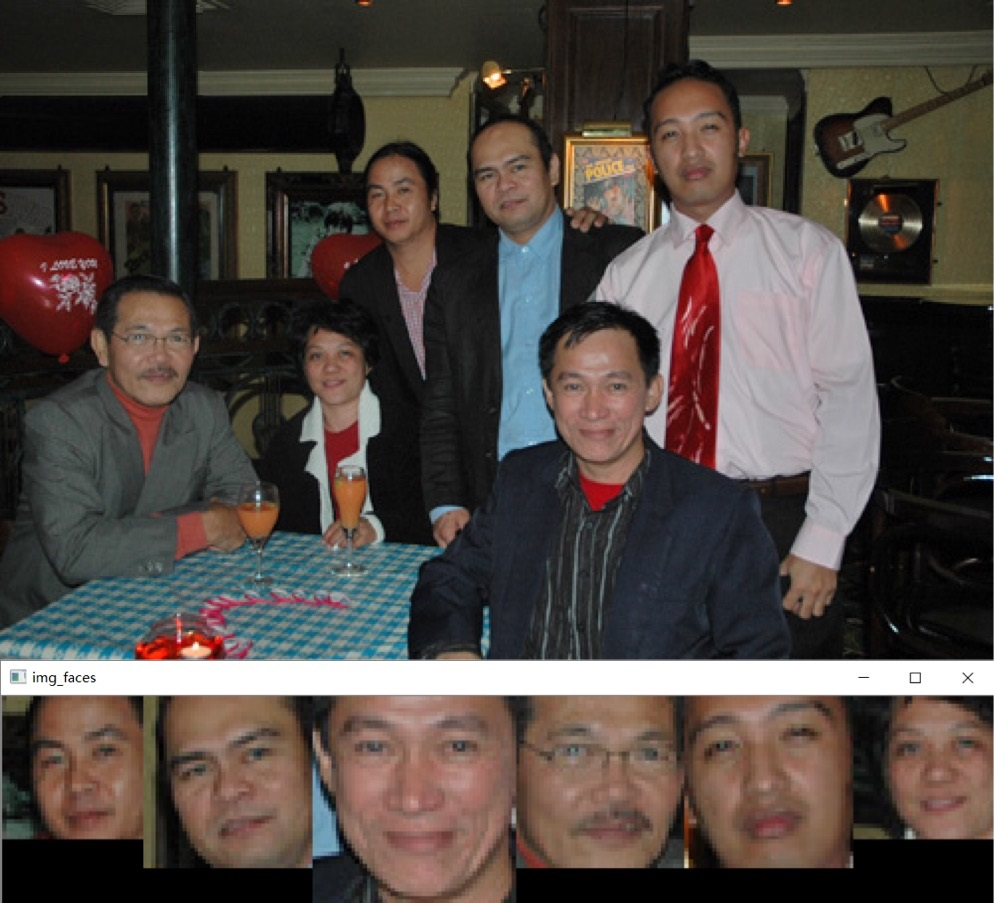
图 1 原图和 crop_faces_show.py 处理后得到的平铺人脸图像窗口
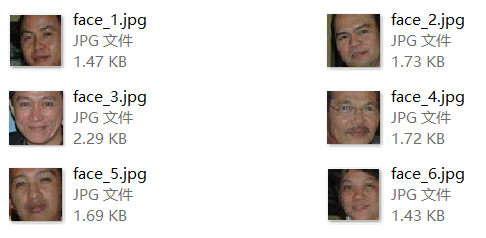
图 2 crop_faces_save.py 处理后得到的多个单张人脸图像文件
1. 开发环境
Python: 3.6.3
Dlib: 19.7
OpenCv, NumPy
import dlib         # 人脸识别的库dlib
import numpy as np  # 数据处理的库numpy
import cv2          # 图像处理的库OpenCv
2. 设计流程
工作内容主要以下两大块:Dlib 人脸检测 和 处理检测到的人脸图像
2.1 Dlib 人脸检测
利用已经训练好的 Dlib 正向人脸检测器 detector = dlib.get_frontal_face_detector( ) 进行人脸检测;
可以得到人脸外接矩形的坐标,用来之后进行裁剪;
具体 Dlib 的使用,请参考我另一篇博客;
( link: Python 3 利用 Dlib 19.7 进行人脸检测);
# Dlib 检测器
 detector = dlib.get_frontal_face_detector()

 # 读取图像
 path = "/***/image_path/"
 img = cv2.imread(path+"test_faces.jpg")
 # print("img/shape:", img.shape)

 # Dlib 检测
 faces = detector(img, 1)

 print("人脸数:", len(faces))
2.2 绘制新图像
如果你想让检测出来的人脸并排显示的话,需要遍历两次( for k, d in enumerate (faces) ):
第一次遍历:记录下我们需要生成的图像窗口的大小,因为需要将多张照片显示在一张图像上,所以需要知道每张人脸照片的大小;
第二次遍历:根据之前得到的图像尺寸新建空白图像,然后开始用人脸矩形填充图像;
2.2.1 确定空白图像尺寸
( 这部分首先要根据检测到的人脸数和人脸大小,来确定绘制图像所需要的尺寸)
第一次遍历:多张人脸要输出到一行,所以先进行一次人脸的遍历j记下每张人脸的大小,记每张人脸的尺寸为 [ 高度 height * 宽度 width ](高度和宽度说明见 图 3 ):

图 3 图像尺寸说明
我取的生成空白图像的尺寸:height_max(最大高度)和width_sum(宽度之和),然后根据尺寸大小来新建空白图像:
img_blank = np.zeros((height_max, width_sum, 3), np.uint8)
图 4 图像尺寸 height_max 和 width_sum
2.2.2 图像填充
第二次遍历:多根据之前得到的图像尺寸新建空白图像,然后开始用人脸矩形填充图像,每次 width 方向从 blank_start 位置开始,每次填完一张之后记得更新起始位置:( blank_start += width ):
for i in range(height):
     for j in range(width):
         img_blank[i][blank_start + j] = img[d.top() + i][d.left() + j]
如果想访问图像的某点像素,可以利用 img[height][width]:
存储像素其实是一个三维数组,先高度 height,然后宽度 width;
返回的是一个颜色数组(0-255,0-255,0-255),按照(B, G, R)的顺序;
比如 蓝色 就是(255,0,0),红色 是(0,0,255);
3. 源码
3.1 crop_faces_show.py
# created at 2018-01-22
# updated at 2018-09-29

# Author:   coneypo
# Blog:     http://www.cnblogs.com/AdaminXie
# GitHub:   https://github.com/coneypo/Dlib_face_cut

import dlib         # 人脸识别的库dlib
import numpy as np  # 数据处理的库numpy
import cv2          # 图像处理的库OpenCv

# Dlib 检测器
detector = dlib.get_frontal_face_detector()
predictor = dlib.shape_predictor('shape_predictor_68_face_landmarks.dat')

# 读取图像
path = "faces_for_test/"
img = cv2.imread(path+"test_faces_1.jpg")

# Dlib 检测
dets = detector(img, 1)

print("人脸数:", len(dets), "\n")

# 记录人脸矩阵大小
height_max = 0
width_sum = 0

# 计算要生成的图像 img_blank 大小
for k, d in enumerate(dets):

    # 计算矩形大小
    # (x,y), (宽度width, 高度height)
    pos_start = tuple([d.left(), d.top()])
    pos_end = tuple([d.right(), d.bottom()])

    # 计算矩形框大小
    height = d.bottom()-d.top()
    width = d.right()-d.left()

    # 处理宽度
    width_sum += width

    # 处理高度
    if height > height_max:
        height_max = height
    else:
        height_max = height_max

# 绘制用来显示人脸的图像的大小
print("窗口大小:"
      , '\n', "高度 / height:", height_max
      , '\n', "宽度 / width: ", width_sum)

# 生成用来显示的图像
img_blank = np.zeros((height_max, width_sum, 3), np.uint8)

# 记录每次开始写入人脸像素的宽度位置
blank_start = 0

# 将人脸填充到img_blank
for k, d in enumerate(dets):

    height = d.bottom()-d.top()
    width = d.right()-d.left()

    # 填充
    for i in range(height):
        for j in range(width):
                img_blank[i][blank_start+j] = img[d.top()+i][d.left()+j]
    # 调整图像
    blank_start += width

cv2.namedWindow("img_faces")#, 2)
cv2.imshow("img_faces", img_blank)
cv2.waitKey(0
结果:
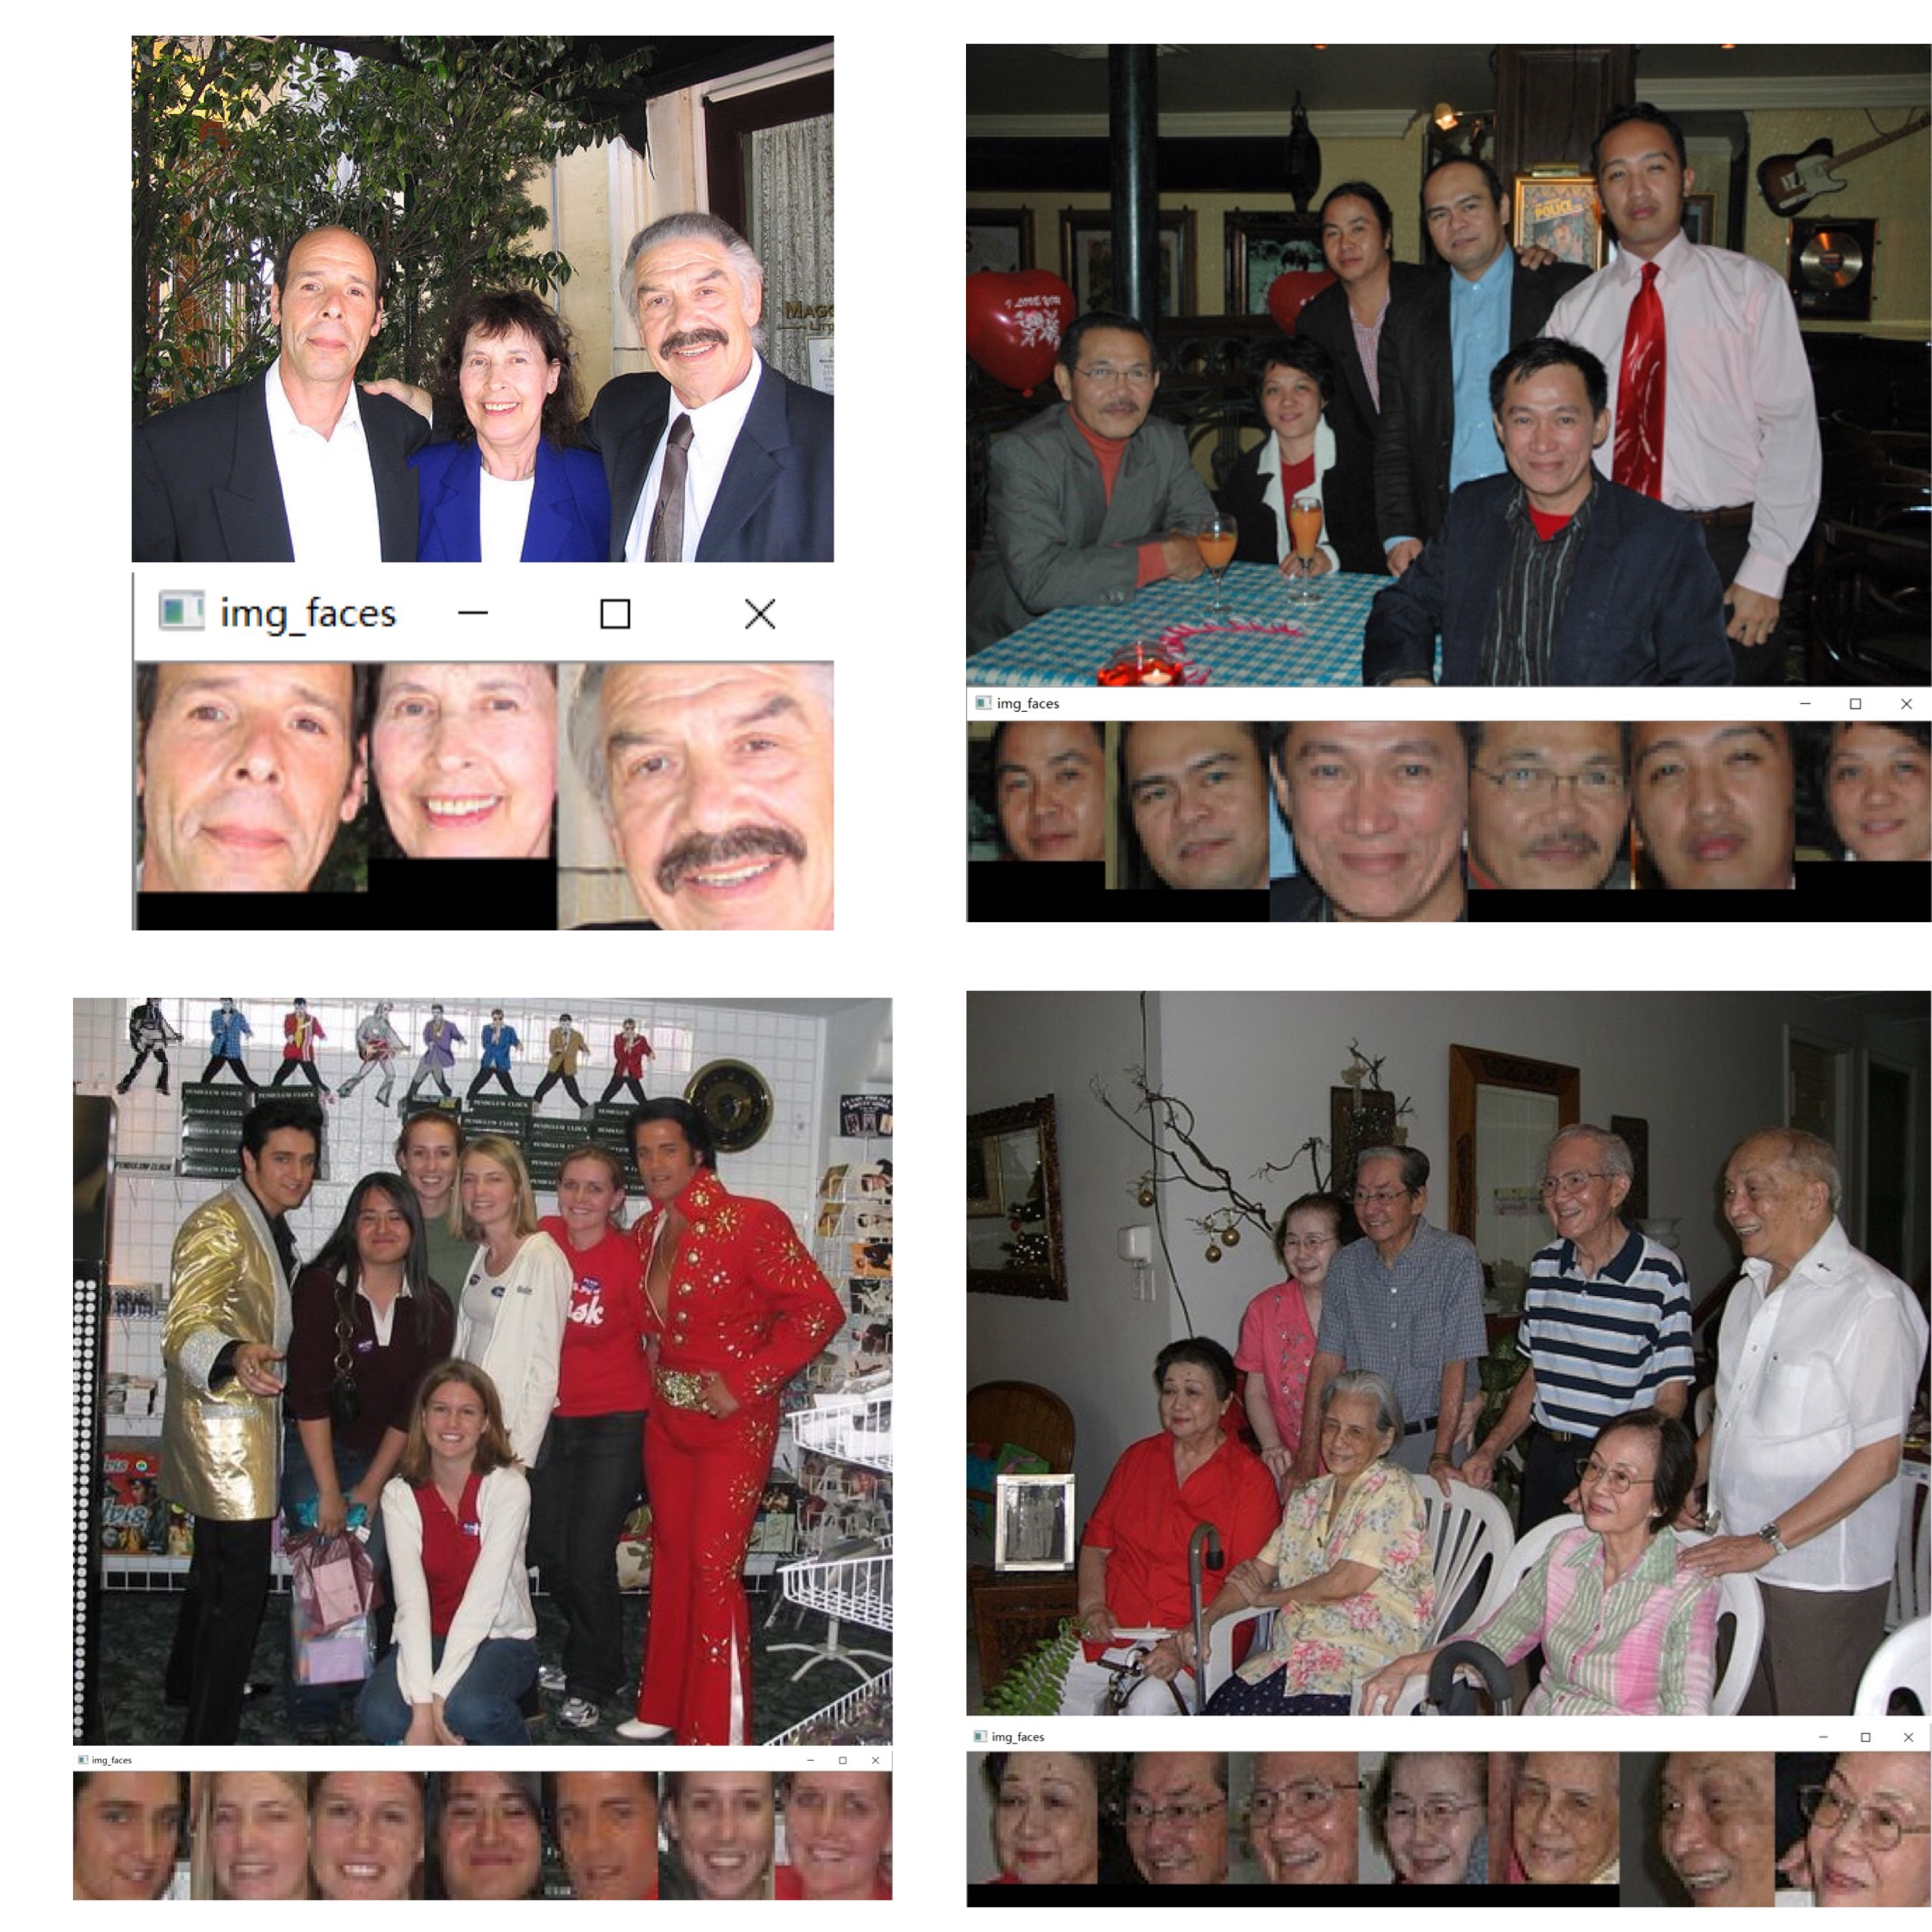
图 5 原图和处理后得到的图像窗口
3.2 crop_faces_save.py
如果你想将识别出来的人脸保存成单个的图像,方便之后处理用,只需将上述代码进行略微修改;
只需一次遍历,根据每次检测到的人脸尺寸,新建空白图像后写入,然后利用 cv2.imwrite 写入到本地:
crop_faces_save.py:
# created at 2018-01-22
# updated at 2018-09-29

# Author:   coneypo
# Blog:     http://www.cnblogs.com/AdaminXie
# GitHub:   https://github.com/coneypo/Dlib_face_cut

import dlib         # 人脸识别的库dlib
import numpy as np  # 数据处理的库numpy
import cv2          # 图像处理的库OpenCv
import os

# 读取图像的路径
path_read = "faces_for_test/"
img = cv2.imread(path_read+"test_faces_3.jpg")

# 用来存储生成的单张人脸的路径
path_save = "faces_separated/"


# Delete old images
def clear_images():
    imgs = os.listdir(path_save)

    for img in imgs:
        os.remove(path_save + img)

    print("clean finish", '\n')


clear_images()


# Dlib 预测器
detector = dlib.get_frontal_face_detector()
predictor = dlib.shape_predictor('shape_predictor_68_face_landmarks.dat')


# Dlib 检测
faces = detector(img, 1)

print("人脸数:", len(faces), '\n')

for k, d in enumerate(faces):

    # 计算矩形大小
    # (x,y), (宽度width, 高度height)
    pos_start = tuple([d.left(), d.top()])
    pos_end = tuple([d.right(), d.bottom()])

    # 计算矩形框大小
    height = d.bottom()-d.top()
    width = d.right()-d.left()

    # 根据人脸大小生成空的图像
    img_blank = np.zeros((height, width, 3), np.uint8)

    for i in range(height):
        for j in range(width):
                img_blank[i][j] = img[d.top()+i][d.left()+j]

    # cv2.imshow("face_"+str(k+1), img_blank)

    # 存在本地
    print("Save to:", path_save+"img_face_"+str(k+1)+".jpg")
    cv2.imwrite(path_save+"img_face_"+str(k+1)+".jpg", img_blank)
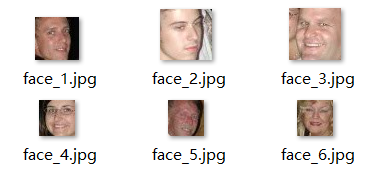
图 6 生成的单个人脸图像文件
GitHub: https://github.com/coneypo/Dlib_face_cut
Mail : coneypo@foxmail.com